

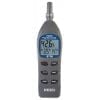


How to use REED SD-2010 Heat Stress Meter and Datalogger
Dew Point Temperature Measurement
Turn on the meter by pressing the Power Button. Function select to “dP”. The upper Display will show the Dew Point Temperature value. The lower Display will show the text “dP”.
TG Measurement
Turn on the meter by pressing the Power Button. Function select to “tg”. The upper Display will show the TG value. The lower Display will show the text “tg”.
Humidity and TA Measurement
Turn on the meter by pressing the Power Button. Function select to “rH”. The upper Display will show the Humidity value. The lower Display will show the TA value.
Data Hold
While taking a measurement, press the Hold Button once and the measured value will hold on the screen, and a HOLD symbol will appear. Press the Hold Button once again will release the data hold function.
Data Record (Max., Min. reading)
The data record function records the maximum and minimum readings. Press the REC Button once to start the Data Record function and a “REC” symbol will appear on the display. With the “REC” symbol on the display: Press the REC Button once, and a ”REC. MAX.” symbol along with the maximum value will appear on the display. To delete the maximum value, press the Hold Button once and the display will show a “REC.” symbol only and execute the memory function continuously. Press the REC Button again, and a “REC. MIN.” symbol along with the minimum value will appear on the display. To delete the minimum value, press the Hold Button once, and the display will show a “REC.” symbol only and execute the memory function continuously. To exit the memory record function, press the REC button for 2 seconds. The display will revert to the current reading.
Datalogger
Preparation Before Executing the Datalogger Function: Insert the optional SD card into the SD card socket. 2) Before you use an SD card with this meter for the first time, it is recommend to format the SD card. See Advanced Settings section of this manual for instructions. If this is the first time the meter is used you need to adjust the clock. See Advanced Settings section of this manual for instructions. Now you need to set the decimal format. The numerical data structure downloaded to the SD card is defaulted used the “.” as the decimal, for example “20.6” “1000.53”. But in certain countries the “,” is used as the decimal point, for example “20, 6” “1000,53”. See Advanced Settings section of this manual for instructions on how to change the Decimal Character.
Auto Datalogger (Set sampling time ≥1 second)
Start Datalogging; press the REC Button, and the “REC” symbol will appear on the LCD screen, then press the Logger Button, the “REC” symbol will flash while the measuring data and time information is being saved in memory. To set the sampling time, and to toggle the beeper sound on or off, refer to the Advanced Settings section of this manual. Pause the Datalogging; while Datalogging, if press the Logger Button once. While paused, the “REC” symbol will stop flashing. Press the Logger Button again to resume Datalogging, and the “REC” symbol will begin to flash again. Stop Datalogging; while the Datalogger function is paused, press the REC Button for 2 seconds. The “REC” symbol will disappear indicating the Datalogging function has stopped.
Manual Datalogger (Set sampling time = 0 seconds)
Set sampling time is to 0 second; Press the REC Button, and the “REC” symbol will appear on the LCD screen. Press the Logger Button, and the “REC” symbol will flash once and one Beep will sound, at the same time the measuring data along the time information will be saved in memory. The lower Display will show the Position (record) number, which is saved as well. To Change the Position Number; press the Down Button and the lower position number will flash on the display. Press the Up or Down Buttons to set the Position Number (1 to 99) to help identify the measurement location. The lower Display will show P x (x = 1 to 99). After the position number is selected, press the Enter Button to confirm. Stop Datalogging; press the REC Button for 2 seconds, and the “REC” symbol will disappear indicating the Datalogging function has stopped.
Data Transfer from SD card to Computer (EXCEL Software)
After Datalogging, remove the SD card from the SD card slot. Plug in the SD card into the Computer’s SD card slot or insert the SD card into the optional SD card adapter and connect to your Computer. Turn your computer on and a folder will appear on your desktop representing you SD card. Open “Microsoft EXCEL”. Download the EXCEL files from the SD Card to the computer by opening up the SD folder and selecting the desired EXCEL files, and drag-and-drop them onto your Computer. Open the files with EXCEL (File – Open). he EXCEL file will have the following column headers in this order: Place (Position Number), Date (Year/Month/Day), Time (in 24h clock), Value, and Unit.
REED SD-2010 Specifications
|
Wet Bulb Globe Temperature
Indoor formula: 0.7WB + 0.3TG
Indoor Range: 0°C – 59°C (32°F – 138°F)
Indoor Accuracy: ±1°C (± 1.8°F)
Outdoor formula: 0.7WB + 0.3TG + 0.1TA
Outdoor Range: 0°C – 56°C (32°F – 132°F)
Outdoor Accuracy: ±1.5°C (± 2.7°F)
Air temperature (TA)
Range: 0 – 50°C (32 – 122°F)
Accuracy: ±0.8°C (± 1.5°F)
Dew Point Temp. Range: -25.3 – 48.9°C (-13.5 to 120.1°F)
Wet Bulb Temp. Range: -21.6 – 50.0°C (-6.9 to 122.2°F)
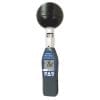
Black globe temperature (TG)
Range: 0 – 80°C (32 – 176°F)
Accuracy: ±0.6°C (± 1.1°F)
Humidity
Range: 5% – 95% RH
Resolution: 0.1% RH
Accuracy: ≥70% RH: ± (3% reading + 1% RH); <70% RH: ± 3% RH.


Reviews
There are no reviews yet.